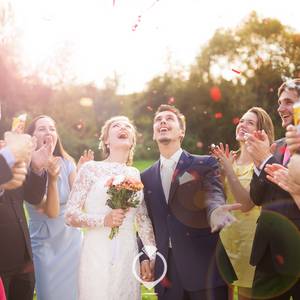


Planning your wedding makeup is one of the most exciting parts of wedding preparation. Whether you're working with a professional makeup artist or considering doing your own makeup, this comprehensive guide will help you achieve the perfect bridal look for your big day.
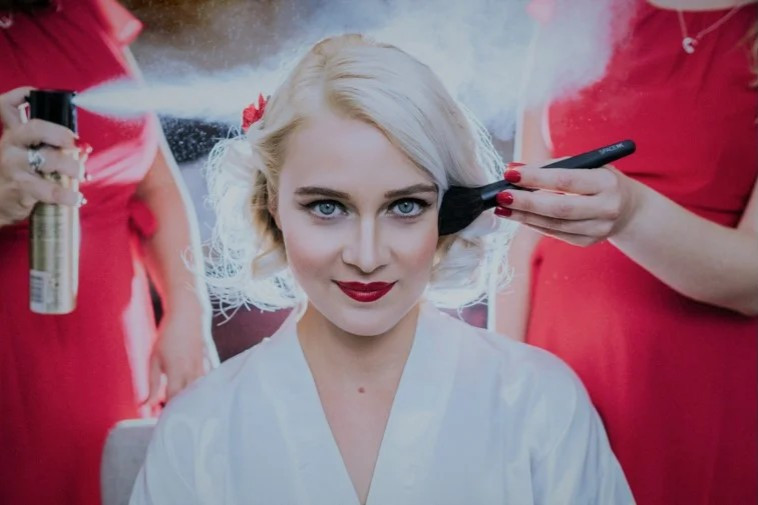
Your Wedding Makeup Trial
You'll want to arrange a wedding makeup trial around 3 months before the big day. Here are our tips on what to expect from your makeup trial and makeup artist...

Take inspiration pictures
As with your hair trial, taking pictures or a Pinterest board is a great way to let your wedding makeup artist know what kind of look you're after. Your makeup artist will ask you lots of questions about how you usually wear your makeup, what kind of wedding you're having and how you envision yourself looking on the big day, so having an inspiration board handy will give them a better idea of what you're looking for.
Dress the part
We recommend that you wear a white or very light top on the day, so that your makeup artist can see how the makeup shades work when set against ivory. White reflects light up at the face, so it can really change the tones of any makeup you're wearing.

Proper prep
To get the most out of your wedding makeup trial, make sure to do a little prep first. Groom your eyebrows - if you're waxing, we recommend at least a two-day gap to avoid redness. Exfoliate using a gentle scrub or flannel to remove any dead or flaky skin. Apply a moisturising face mask the night before. Your makeup will sit much better on a smooth, hydrated surface. If you're worried about any specific aspects of your skin, such as acne, dryness or rosacea, your makeup artist should be able to give you some good skincare tips to stick to ahead of the big day.
Don't be afraid to tweak
The whole point of a makeup trial is to test a few different things before the day. If you want to try a few different lip colours, or want to try darkening the eyes after the look is finished, just let your makeup artist know! You may decide that you want to make changes after the trial is over and you've seen your makeup in a few different lights. Simply speak to your artist so that she knows well in advance of the big day.

Picky about products?
If you're dead set on using a specific product, such as a lipstick shade that you love or a foundation that you know works well for your skin, then bring it along to the trial with you. If you have a specific colour or brand in mind, check with your makeup artist in advance.
Ask about timing
It's likely that your makeup during the trial will take longer than your actual wedding makeup. However, it's always worth asking how long you think the look will take to recreate on the wedding day so that you can plan your schedule accordingly. This is especially true if your hair and makeup are being done by the same person!
Expert Advice from Ruby Hammer MBE
Urban Retreat's Make up Salon Creative Director and Celebrity Make up Artist Ruby Hammer MBE shares her professional insights for achieving the perfect bridal look.
Skincare Preparation
Try to get into a skincare and grooming routine ideally 3 months before your big day to truly benefit from your efforts. Have regular facials, manicures and pedicures, hair masks and adopt a more disciplined skincare routine at home to complement that of the salon.
Trial Essentials
Have a trial beforehand with your makeup so there are no big surprises on the day. If you are going to be sun tanned or are having a spray tan, make sure you have that done on the trial day too. You want to know that everything has been addressed in advance so you can enjoy your big day. It's best to not go for a totally different look from your usual one, so that you'll be at your most confident.
Application Techniques
Make sure you use a primer. Thin layers are better than one thick layer of makeup - make sure everything is blended. Avoid harsh lines and be sure to use waterproof mascara and eye pencils so you won't run on the day. Keep a powder compact in your bag or some blotting papers for those little on the go touch ups. Do not use a moisturiser or cream with SPF in it as you will look strange in your photos or video.
Choosing Your Look
Nothing too heavily made up, avoiding too much of a smoky eye. It's best when all your features are defined so that you don't look washed out, but don't go too dramatic. Stay away from clumpy lashes and heavy contouring to look fresh faced and lovely.
Individual lashes to go doe-eyed always adds a little bit of drama to your look. A strong lip colour can look amazing. Pinks are typically bridal but are even more in vogue right now. There is a red revival too - but it's important to not be too heavy handed in the application and to also try the shades of red that'll work with your skin tone.
Avoiding Trends
It is best to avoid really big trends on this occasion as it might look dated in your photos. You want to look timeless but not boring and certainly not just following the latest trend.
Rain-Proofing Your Look
Use a primer before makeup, thin layers of foundation and add powder over creams and pencils. Of course, use waterproof mascara and makeup setting sprays. Finally always carry blotting papers and powder with you to touch up your makeup whenever you need.
DIY Bridal Makeup
If you're considering doing your own bridal makeup, you know your skin best and what suits you, so have confidence in your beauty skills. Here's everything you need to know to achieve professional results.

The 4 P's of DIY Bridal Makeup
Planning
You need to plan your wedding makeup look carefully. There are tons of bridal makeup looks, so have a think about what look you want to go for. Natural? Glam? Vintage? It's a good idea to collect photos and magazine clippings of bridal makeup looks that you want to replicate. Visit beauty counters and ask for free samples. Take photographs in all lights and angles.
Practising
Once you've decided on your bridal makeup look, it's time to practice. Watch makeup tutorials on YouTube or book a makeup lesson if you're stuck with technique. Whilst you should definitely practice applying the makeup to achieve the look you want, don't experiment and attempt something that just isn't you. If you don't normally wear heavy makeup - don't try it. Practice a bridal makeup look that you love, matches your personality and is essentially you.
Prepping
Beautiful bridal makeup starts with beautiful skin. In order for your skin to look its absolute best when wearing makeup, you must prep your skin. This means splurging on facials, moisturising, exfoliating and toning.
For a beautiful bridal glow, getting active in the months leading up to the wedding detoxes the skin, as does staying hydrated. Eating healthily also goes a long way. Avoid alcohol in the weeks leading up to the wedding as it can make you look and feel puffy, alongside dilating the blood vessels in your skin. Definitely skip the tanning beds and go for spray tans or self-tanning instead.
Products
You definitely don't need to buy all new makeup - use the products that you know will work for you and your skin. Your wedding will likely last all day, with hundreds of photo opportunities - so your bridal makeup will need to be waterproof, smudge-proof and tear-proof.
Step-by-Step Application

Base Makeup
Always begin with a clean face that is well moisturised.
Primer: Always use a primer first. They smooth out lines and help to keep your makeup firmly in place - essential for weddings. Apply the primer in a downwards motion. Opt for a silicone-free primer as silicone-based primers can clog your pores up.
Foundation: Opt for foundations that say 'long-wear', 'long-lasting' and/or 'waterproof'. You need a reliable foundation that you know is going to last the entire day and suit your skin tone and skin type. If you have dry skin, a matte foundation won't be the best idea. Equally, if you have oily skin, then it's best to opt for oil-free foundations.
If you are having a summer wedding, using foundation with SPF would seem sensible. But unfortunately, it can give you a ghostly complexion in your wedding photographs. Use SPF in your moisturiser and not your foundation for summer outdoor weddings.
Concealer: Need more coverage? Apply concealer post-foundation application in areas that need it, especially under the eyes, around the nose and on blemishes.
Eyes
When it comes to your bridal makeup, don't be afraid to amp up the volume with your eyes. Big, sparkling eyes are a must for weddings and always turn heads.
For big, bright eyes, you must:
- Define your brows - get them professionally shaped which will lift your face and help to frame your face.
- Use an orange-toned concealer (as close as possible to your skin tone) underneath your eyes to hide dark circles
- Apply white eyeliner in the waterline to further open up your eyes
- Use an eyelash curler, before applying two coats of mascara
- Stick to natural and neutral tones when using eyeshadow
However, you can up your wedding beauty game with bridal eyelash extensions. False lashes are amazing at making your eyes pop and can last 2-4 weeks without falling out, meaning that you will still have eye-popping gorgeousness for your honeymoon.
Cheeks
Your cheeks can make or break your wedding makeup. Accentuate fabulous cheekbones with blusher, bronzer and highlighter.

Contouring is popular for weddings because it plays up and accentuates your natural features and gives you an amazing bridal glow. To contour - suck your cheeks in, to find out where your contour placement is and apply bronzer with an angled blush brush. Apply the bronzer diagonally from the ears to underneath your cheekbones. The bronzer should be no more than 2 shades darker than your natural skin colour. You don't want any sharp lines so definitely blend. Highlighting comes next and this should be applied above the bronzer for that wedding glow. The highlighter should also be no more than 2 shades lighter than your natural skin colour.
Then pop some pink blusher into the apples of your cheeks for a rosy bridal glow.
Lips
For a wedding kiss that he will never forget, wear lip stain on your lips as the finishing touch to a beautiful face. Lipgloss won't last and lipstick will need to be reapplied and can smudge - but lip stain has lasting power.
In your hunt for the perfect wedding lip stain, opt for colours that you regularly wear in your normal life. This makes the process easier as you know which lip colours suit you and which match your personality. Make that kiss all the more special by ensuring you keep your lips supple by exfoliating and moisturising in the weeks leading up to the wedding.
Finishing Touches
Finish off your bridal makeup with makeup setting spray. It will add extra holding power. Keep calm and carry a well-stocked clutch for bridal makeup essentials and touch-ups throughout the day.
If you are feeling oily, carry some tissue on you to blot out oil on your T-Zone to control shine.
Wedding Makeup Styles
Smokey eye
Mastering the smokey eye of your dreams is sometimes tricky for brides-to-be. Perfecting the ideal amount of blending without making yourself look like a racoon is something I certainly haven't succeeded in doing! However, when done perfectly, it can create the most gorgeous wedding look!

Natural makeup
Natural makeup is the most commonly requested makeup look. Despite looking natural and glowy, lots time and effort still goes in to creating the perfect natural look. This makeup style focuses on accentuating the brides features and minimising skin blemishes. This look will look perfect for any situation and any lighting!

Nudes
We love nudes on a wedding makeup look! Understated yet prominent, nudes give the impression of a natural, yet put-together look. Effortlessly framing the face, the nude shades are placed on the eye and the lips to accentuate the features and give them a smooth look.

Vintage
Creating the perfect vintage look often depends on the brides face and hairstyle. The bold red lip, the dark lined eye makeup, and the pigmented blush is often what constitutes a vintage 1940s inspired look.
Glitter!
You really can't go wrong with packing your lid with a bit of shimmer. Pairing perfectly with nudes, smokey eye, or a natural lid means it can give any bride that extra something on their big day. Don't forget, glitter is not only restricted to the eyelid! Pack on the highlighter or add some gem stones to your cheekbones to create a glowy, festival look for your big day. After all, the bigger the better!

Final Tips for Success
Whether you're working with a professional or doing your own makeup, remember to wear a buttoned up shirt when you get your wedding hair and makeup done, so that you don't mess up your beautiful hair and makeup when taking your shirt off to get into your bridal dress.
Research everything thoroughly - look at magazines, celebrities, other weddings you have attended. Do a mood board of what you like and ask your trusted friends if this would work on you. Really research everything so you are confident you have covered all bases.

Most importantly, choose a look that makes you feel confident and beautiful. Your wedding day is about celebrating you, so ensure your makeup reflects your personality and makes you feel like the best version of yourself.
Looking for the perfect makeup artist? Find your local beauty expert through professional wedding makeup services to ensure you look incredible on your big day.